Configuration & Styling
Maps module provides precise control over the visual presentation of your geographic data. Whether you are adjusting the contrast of a base map for optimal visibility on a single operator's monitor or color coding critical heatmaps and operational markers across a high resolution video wall in a control center, this toolset ensures your spatial data is both clear and highly actionable. By allowing you to seamlessly swap foundational maps, apply custom overlays, and fine tune the individual properties of every distinct data layer, you can craft a tailored, localized view that perfectly aligns with your situational awareness requirements.
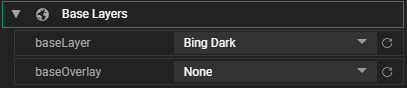
Base Layers Settings
- Base Layer (
baseLayer) - Choose the main tile layer to use as the base map.
- You can select from built-in tile options or import a custom tile layer through the TileSource (will appear as a normal layer).
- Base Overlay (
baseOverlay)(Optional) - Add an overlay layer on top of the base map.
Layer Customization
Each layer you add to the map can be individually styled.
Customization options vary based on the layer type (e.g., Marker, Heatmap, GeoJSON, etc.).
To edit the styles and settings:
- Select the layer from the Layers tab.
- Open the Settings tab.
- Select a Layer and expand.
- Adjust properties based on that layer's capabilities.
🔍 Refer to each specific Layer type documentation (e.g., Marker Layer, Heatmap Layer, Icon Layer) for detailed configuration options.