How to Collage Content on Video Walls
Modern control rooms and operational centers require more than a single visual feed. To maintain complete situational awareness, operators need to monitor geographic data, live metrics, and multimedia simultaneously. Using the Lygos video wall software, you can effortlessly collage diverse content types across your massive video wall displays.

This guide will walk you through the process of setting up your screens, creating various assets, designing flexible grid structures, and deploying a rich visual collage onto your video wall.
1. Setting Up the Video Wall Environment
Before you can arrange a collage, you must establish your digital canvas. Open the Display Module and create a new Screenspace. This process logically groups your distributed commercial screen nodes into a single unified video wall. Once connected, your individual monitors will act as one seamless display capable of rendering high resolution collages.
2. Generating Visual and Media Assets
A powerful collage requires diverse information. Lygos allows you to build and import multiple types of content tailored for your operational requirements.
Integrating Multimedia Content
Navigate to the Media Module to prepare your supplementary assets. You can upload multi page PDF briefings using the Documents viewer, connect live RTSP surveillance camera feeds through the Stream element, or embed HTML Web pages. You can also incorporate weather widgets, RSS news feeds, and Kanban boards to keep your team informed alongside your core operational data. Check Media Module for all the supported multimedia apps of our software.
Building GIS Map Visualizations
For spatial intelligence, use the Maps Module. Connect your spatial databases or GeoJSON files to create interactive maps. You can add tracking layers for fleet management, heatmaps for incident density, and cluster layers to summarize dense data points. These maps will serve as the perfect geographic anchor for your video wall collage.
Configuring Data Dashboards and Charts
Raw numbers need visual context. In the Visualization Module, connect your databases, REST APIs, or MQTT sensor feeds. Transform this live data into animated line graphs, scatter plots, or prominent KPI value indicators using the built in charts.
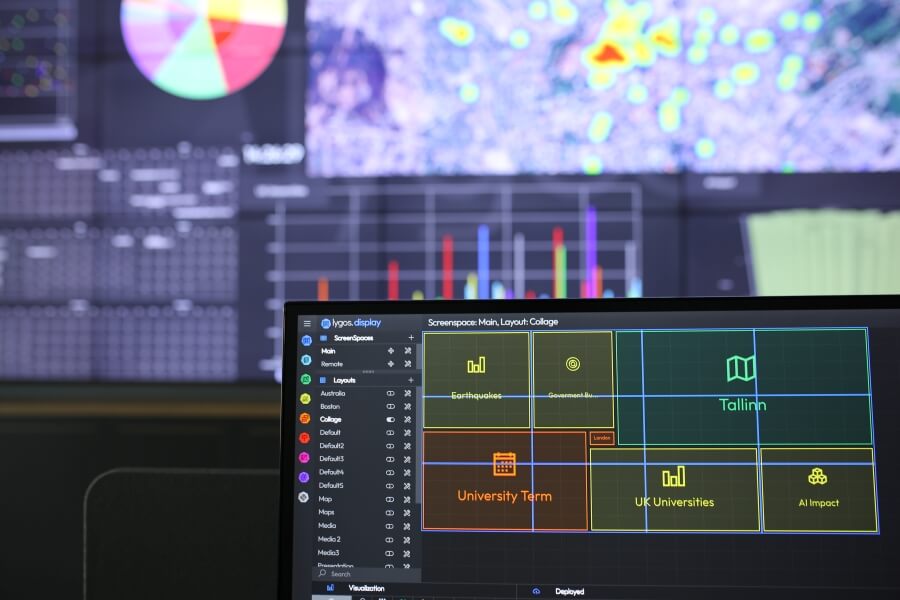
3. Designing Video Wall Layouts
With your content prepared, return to the Display Module and select your active Screenspace. Here, you will create Layouts. A Layout defines how your screen area is divided into an inner grid. You can configure this grid to match your exact needs, such as a large central space for a map surrounded by smaller peripheral slots for charts and camera streams.
4. Deploying Content into Layout Grids
Once your Layout is established, switch to the Visualizations Tab within the layout editor. You will see a list of all your created maps, charts, and media assets. Simply drag and drop the visualization cards directly into the empty grid slots of your layout. The content will automatically scale to perfectly fit the assigned area, forming your comprehensive video wall collage.
5. Switching Layouts Dynamically
Operational needs change rapidly, and you are not locked into a single collage. You can create multiple different Layouts for the same Screenspace. Using the Quick Action Menu, operators can instantly switch the active layout to shift the video wall from a standard daily overview to a dedicated emergency response collage. You can also use Video Wall Automations to schedule these layout changes automatically based on shift rotations.
6. Replacing and Updating Visualizations
If you only need to swap a single piece of content within your active collage, you do not need to build an entirely new layout. Click on any currently active visualization card within the layout grid and select the unload option. You can then drop a new asset into that newly freed space, instantly updating the video wall without disrupting the rest of the collage. Alternatively, you can use switch option to switch one deployed visualization with another one.
7. Direct Deployment from Content Editors
Lygos streamlines the deployment process by allowing you to push content directly to the wall while you are still building it. From the Maps, Visualization, or Media editors, you can click the Deploy button. By selecting your target Screenspace, you can choose the Add to First Available Space option to instantly drop your new creation into the next empty layout slot. Alternatively, use the Replace Visualization option to swap it with an existing asset on the wall.
8. Assigning Assets to Dynamic Slots
For maximum control, Lygos utilizes a Dynamic Slot system numbered from 1 to 16. Within any content editor, you can Assign an asset to a specific slot number. When that numbered slot is loaded onto your active video wall layout, the assigned visualization will automatically appear. This allows administrators to preconfigure complex content targeting without having to manually arrange the final layout grid.